Showing posts with label GameHack. Show all posts

Thursday, October 6, 2022

[GameHack] Kut-Up The Klown: A New Killer For Final Girl By Van Ryder Games

One of my favorite hobbies is playing boardgames. One of my favorite side-hobbies is tinkering with or adding new elements to those same games. I'll create new content or rules for them, or sometimes I'll tweak the game's components to make the playing experience more interesting. Today's project describes a new killer I created for Final Girl by Van Ryder Games.

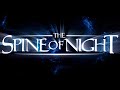
A quick overview: Final Girl is a solo player game where you try to survive the onslaught of a crazed slasher from straight out of the movies. In fact, Final Girl is very modular with a variety of different final girls, slashers, and locations you can mix and match. In Season One, you have killers such as the masked cannibal, the puppet master, the poltergeist, nature's avenger, and the dream doctor. However, my favorite slasher genre is the killer clown (or "klown" if you will). So, using a basic template and limiting myself to 27 playing cards, I decided to create my own slasher. The following is a playtest photo montage of Kut-Up the Klown!

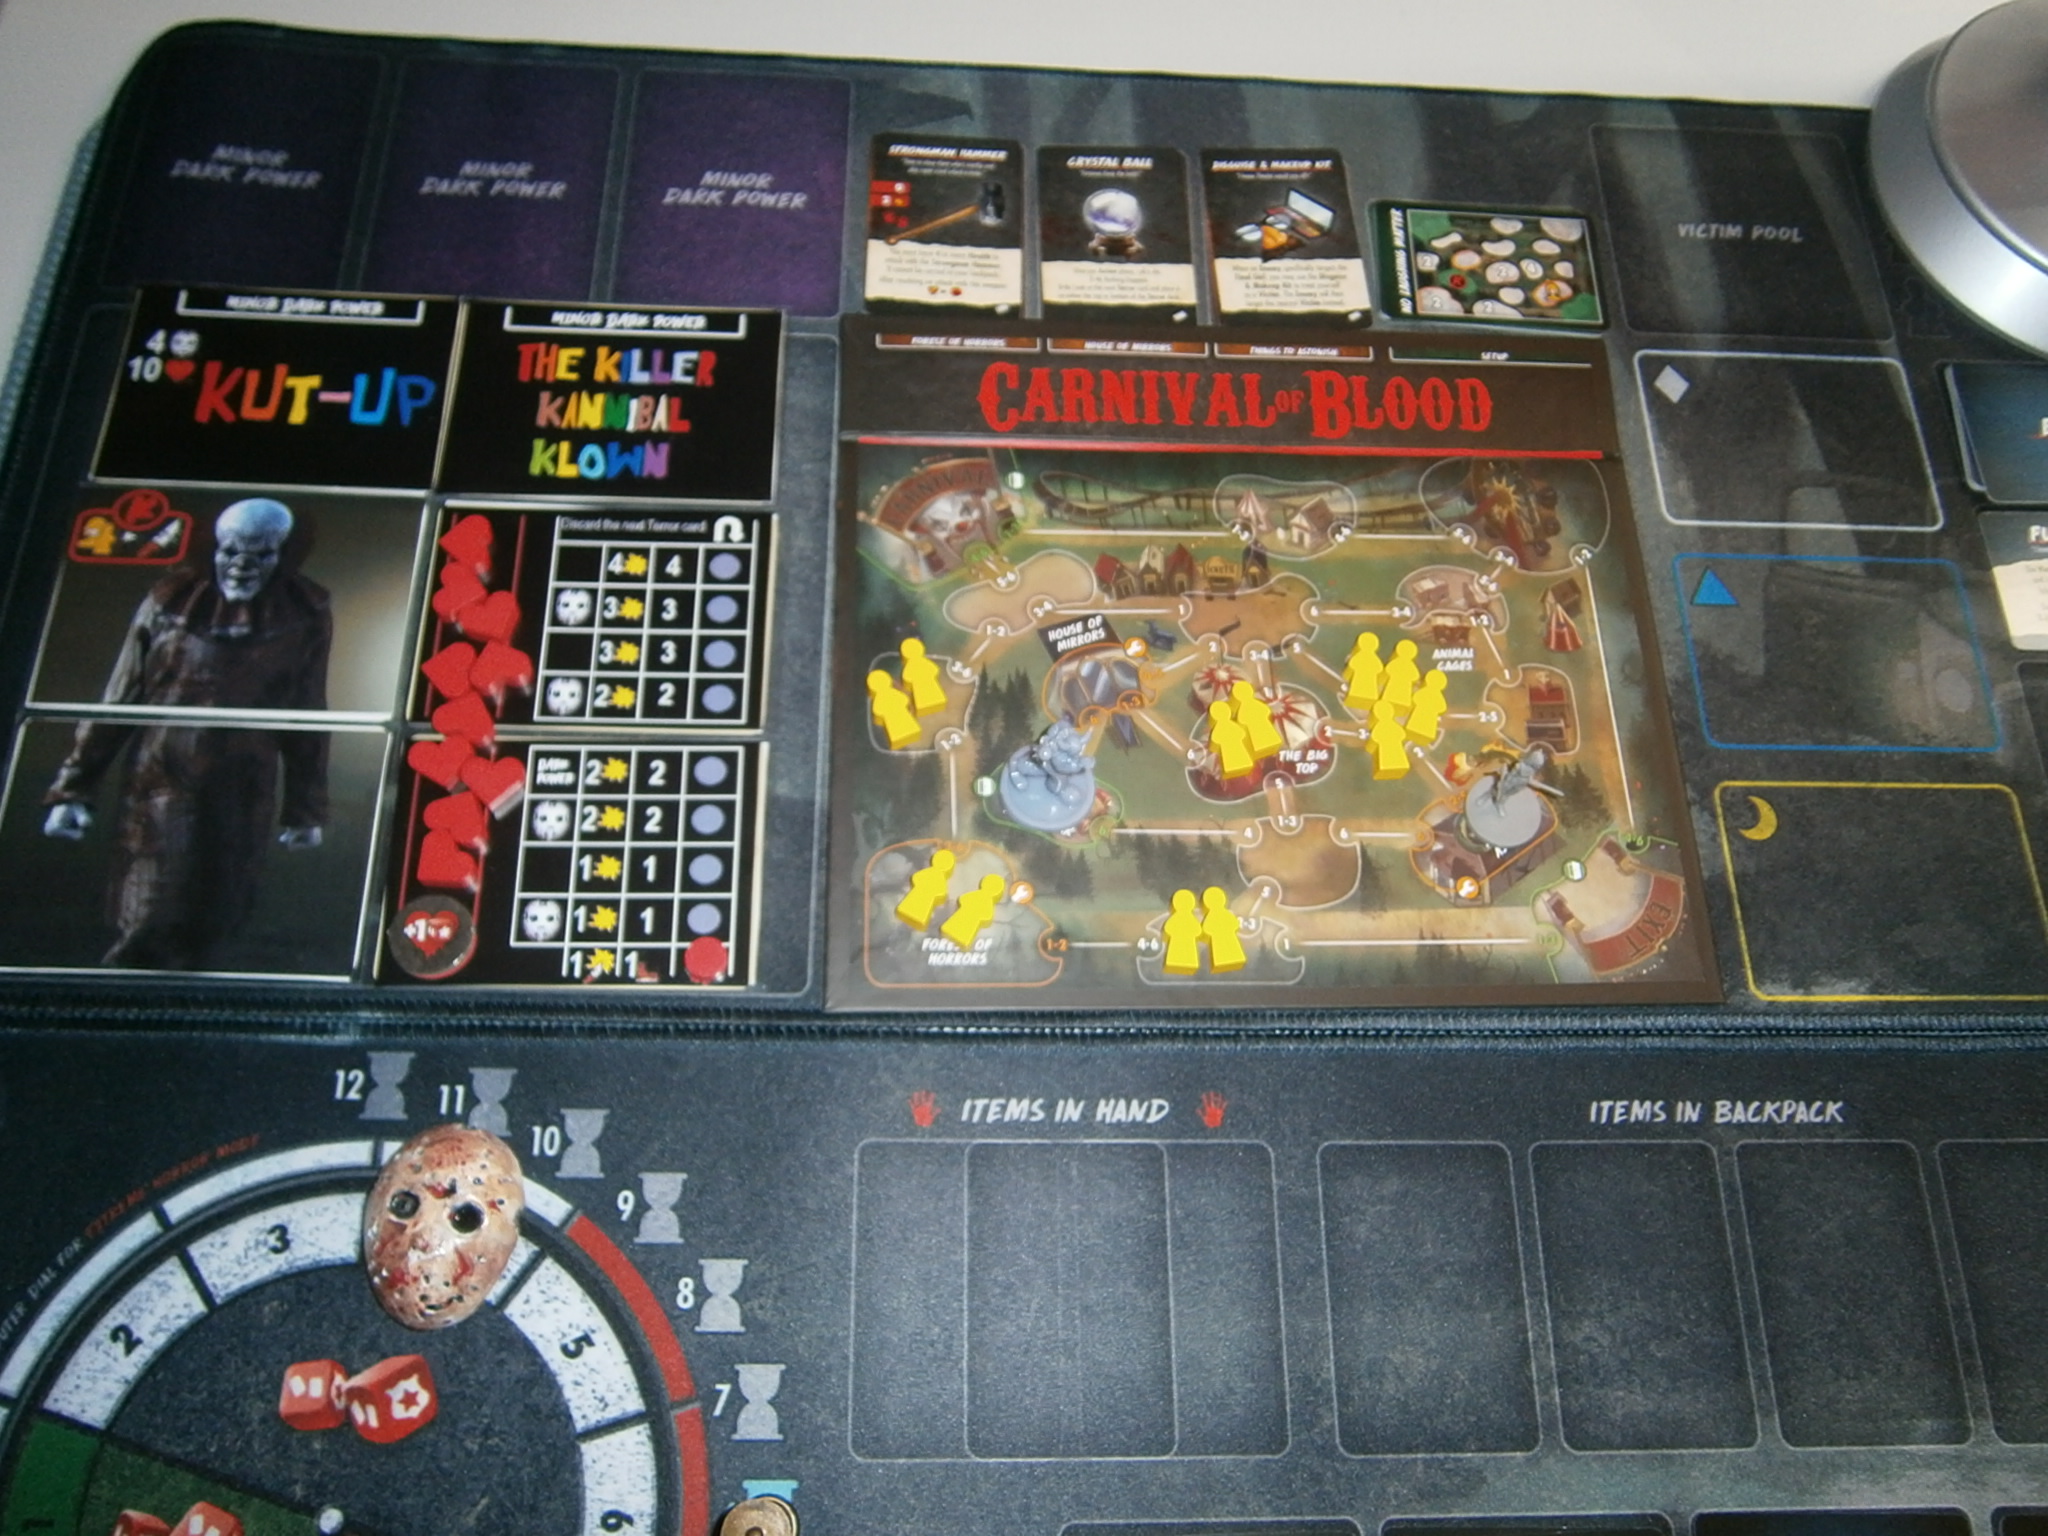
Meet "Kut-Up the Klown"! (Once called the Killer Kannibal Klown, until some folks pointed out the unfortunate "KKK" abbreviation. Cards have been updated since this photo was taken.) Whether he comes from outer space or the sewers, this creature's rictus grin and maniacal laughter freezes its victims in their tracks!

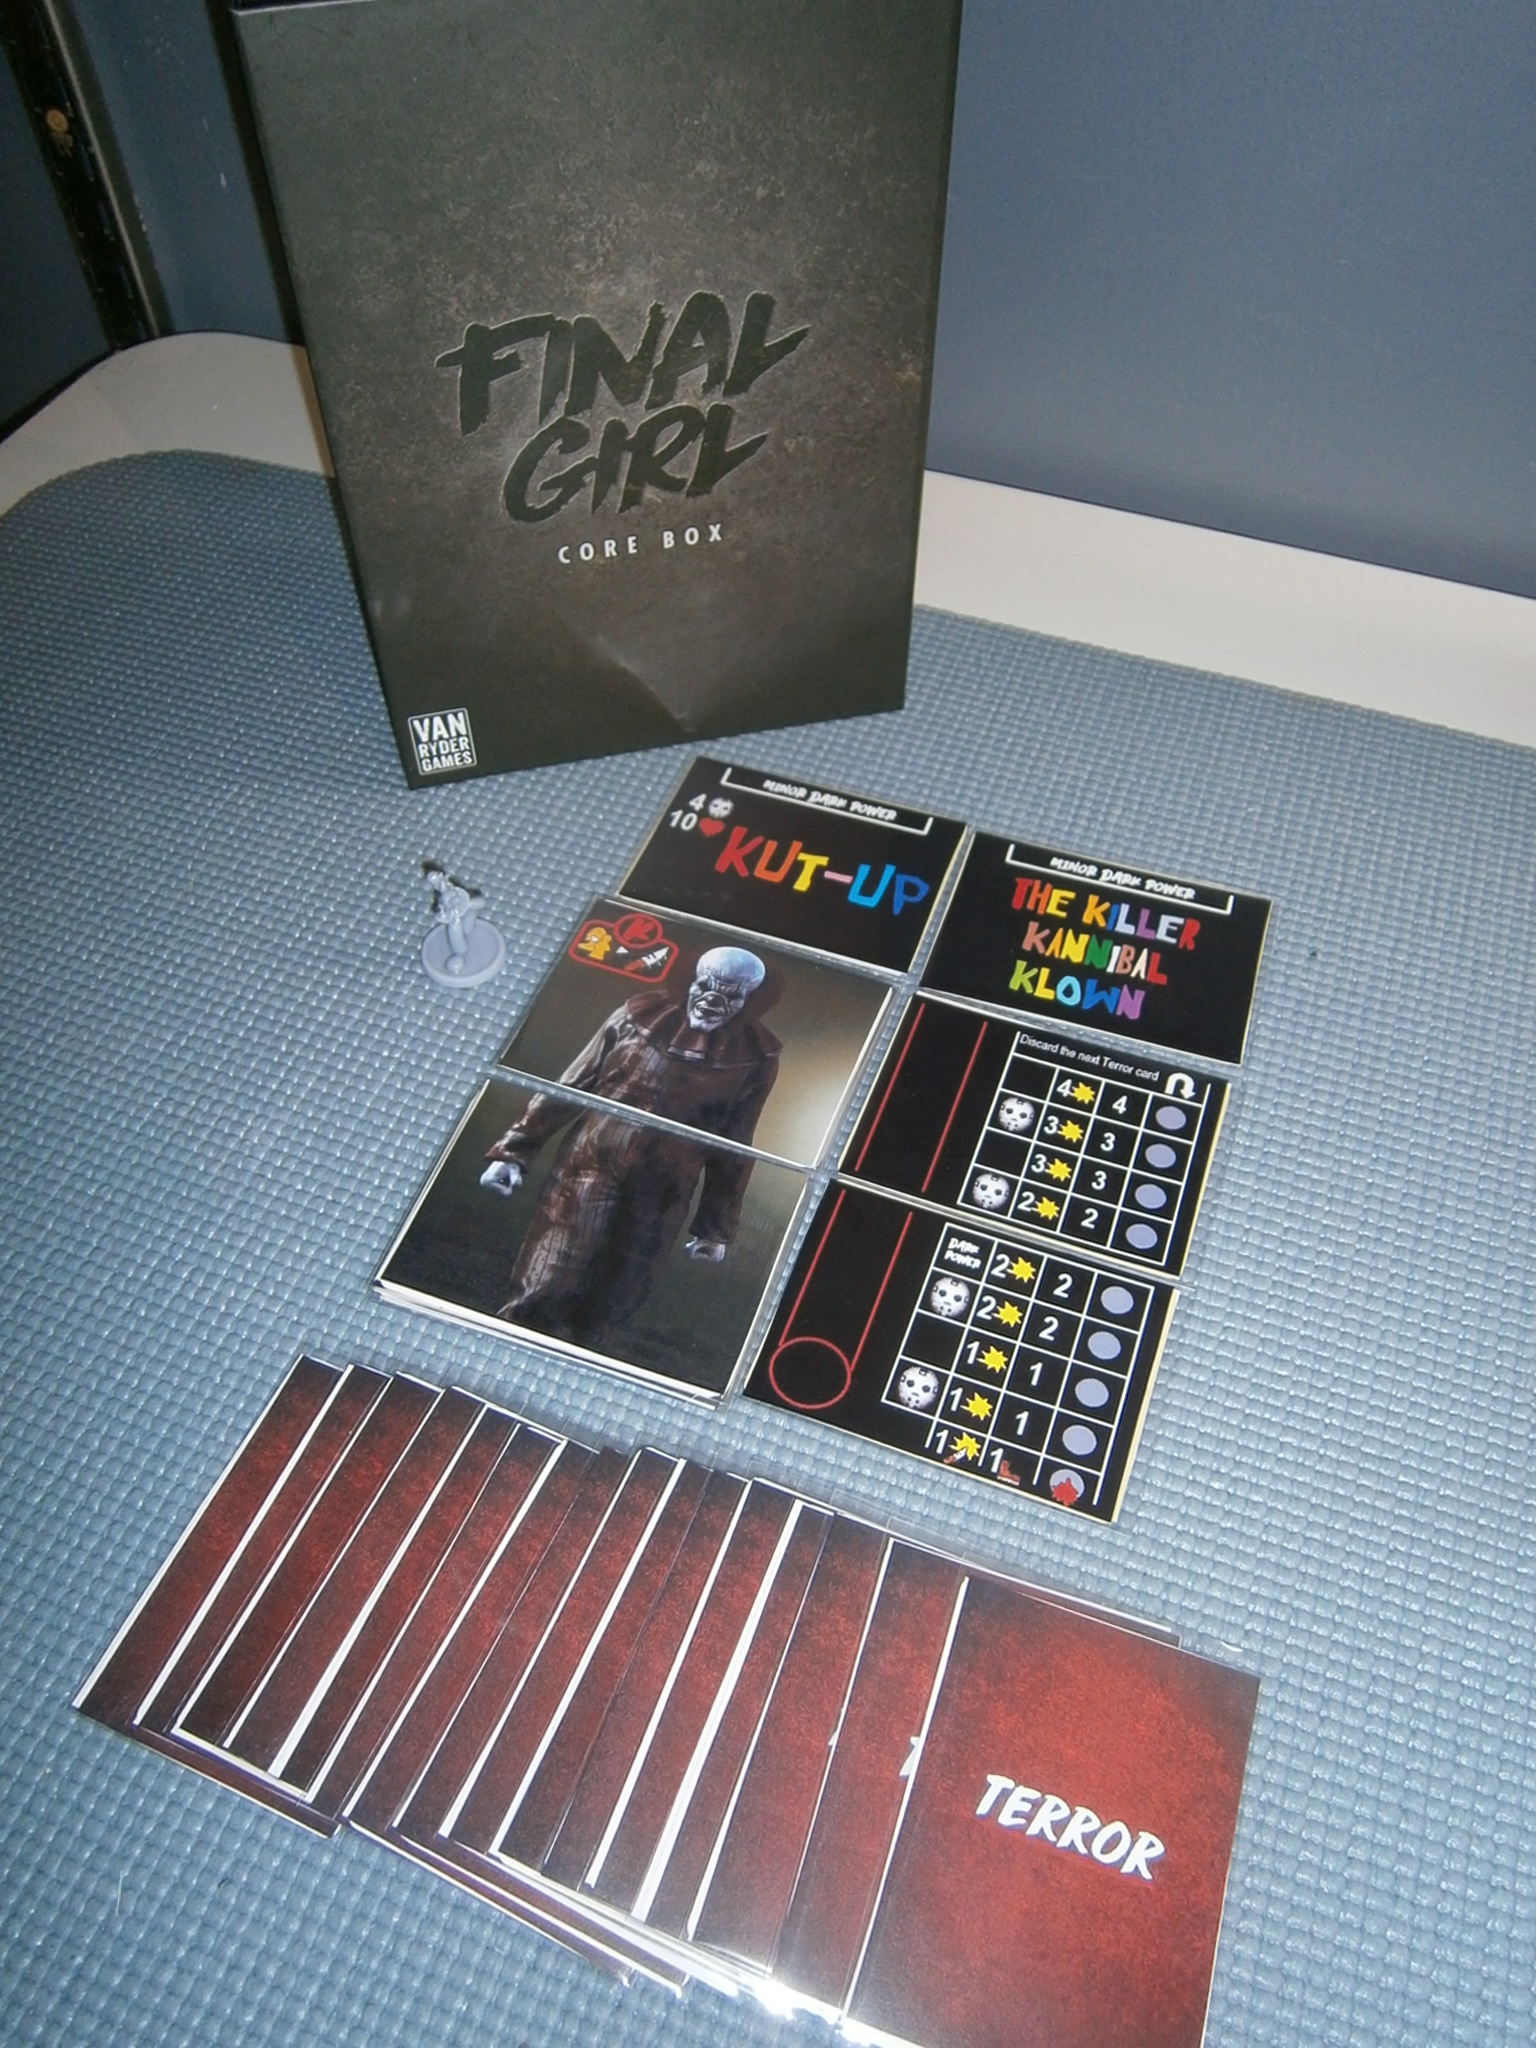
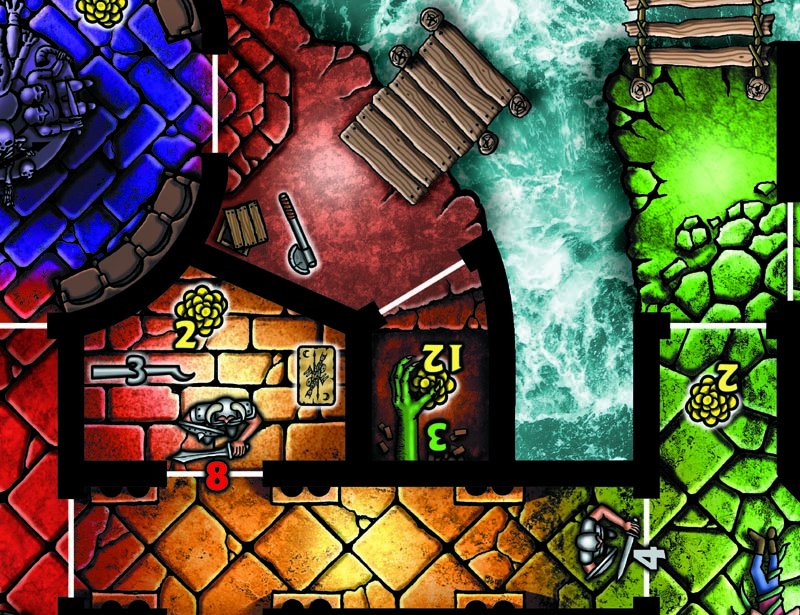
Where else but at the Carnival of Blood would be appropriate? And of course, Kut-Up pops out of the clown car to begin his rampage...

...running over to attack Laurie as she tries to get her bearings in all the chaos.

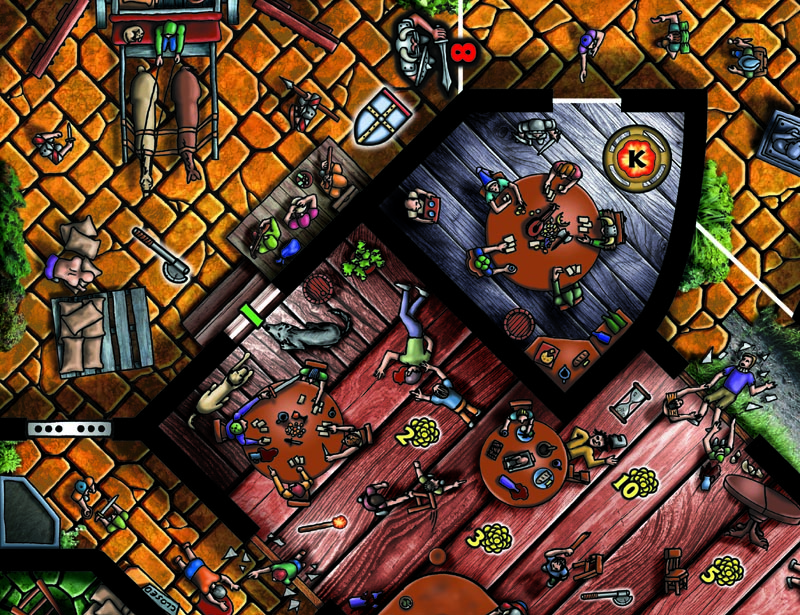
Some victims found themselves huddled in The Big Top. But then, EVERYONE ran there for cover...just in time for Kut-Up to bounce in and slaughter a few innocents. He then left to stalk Laurie...

...only to change his mind and pop BACK into the Big Top to kill more victims! Meanwhile, everyplace NOT in the Big Top, Laurie was saving everyone she could.

Kut-Up had taken a few hits from Laurie, but when his Dark Power was triggered, it was all undone due to his "magic trick" and he healed to full!

Laurie was one saved victim away from getting her bonus, so she sprinted across the midway, grabbing the last victim and getting them to the exit.

As long as she kept her strength up, she could use the sledgehammer versus the crazed clown, dealing an additional 4 points of damage! No more victims on the board, so time to go hunting...

Did I say no more victims? Well the next Terror card I drew was discarded if no victims on the board. Drew the next and it was discarded because there were no traps in the item discards. The NEXT card I drew was either take damage or lose victims! Since there were no victims, I took 3 damage! And it was the last Terror card, triggering the Finale!

Th-th-that's all folks! Kut-Up flew into a rage, but Laurie was safe on the other side of the midway. She was able to heal up before he came charging at her. (And no victims on the board kept the bloodlust track from spiraling out of control.)

They traded blows under the ferris wheel, but Laurie's retaliation kept sending any damage dealt back to Kut-Up. Then Laurie landed a furious strike with the sledge, doing 6 points! She lost a bit of health due to the use of the sledge, dropping it to the ground. But Kut-Up was defeated for good.

And there you have it. A custom deck of 27 cards brings a new killer to Final Girl! (You'll have to go find an evil clown mini of your own!)

Kut-Up the Klown can now be downloaded at Board Game Geek in the Final Girl Files section. Click here for the link!


Saturday, July 30, 2022

My Convention-bound Custom-made Trapper Keeper!

When I attend conventions to run games, I have found that a 3-ring binder is perfect for me to use at the table. A small pocket-purse up front carries my extra pencils, timer, dry-erase markers, etc. The cover pocket holds my pre-gens. And I place my adventure scripts into plastic sleeves so I can write on them during play to make note of current hit points, playtest notes, etc. With the exception of my dice bag, everything fits into this one binder behind the screen.

Several months ago, I made a suggestion that the only way this could be even more retro-gaming at the table was if it were a Trapper Keeper. You know, those hold-everything-and-then-some binders that were all the rage back in the 1980s (when Yours Truly was in school and discovering RPGs). Today while shopping, I passed through the Back To School section and found a WALL OF TRAPPER KEEPERS. I honestly thought they didn't make these anymore! So I scooped one up, brought it home, and converted it to my NEW convention-bound gaming binder!

The wall of Trapper Keepers! You can almost smell the 1980s, can't ya?

My current gaming binder on the left, and my new TK on the right, about to undergo some alterations!

I didn't want the TK front "flap" to cover up my favorite gaming artwork (Vallejo's Death Dealer), so to access the back cover area, I cut a flap on the inside back cover.

Turned the TK over, opened the flap to the edge, and slipped in the artwork from my gaming binder. (I could've printed a new one, but this printout has been with me since Gen Con 2008.)

And a strip of black duct tape hides the slit nicely.

For the front, I added some of my favorite unused stickers.

The TK comes with two of those slip-in "portfolios". I likely will use them for maps and pre-gens.

And my pocket-purse in the front with pencils and what-not.

Here's the final front.

Here's the final back.

Wednesday, August 5, 2020

[GameHack] Improving Game Pieces For Reanimator By Dynamite Entertainment

One of my favorite hobbies is playing boardgames. One of my favorite side-hobbies is tinkering with or improving those same games. I'll create new content or rules for them, or sometimes I'll tweak the game's components to make the playing experience more interesting. Today's project describes the tweaks I made to my copy of Reanimator by Dynamite Entertainment.

A quick overview of the game: You (and a few friends, if you have them) are assistants to Herbert West as he attempts to perfect his reanimator serum. You roam the streets of Arkham, picking up ingredients, research, and corpses for your ghoulish experiments, while avoiding the city watch (as well as any undead you've accidentally let loose). You play through three acts for each player, then attempt to improve the serum. At the end of six rounds, you have one final experiment to finalize the process and either create the perfect formula...or die at the hands of the undead horde you've unleashed.

The game has many nifty 3D buildings that represent the town of Arkham, which is a neat selling point. However, the rest of the components are tokens and chits to represent your health, sanity, the undead, tomes you find, etc. Even Herbert West and the city watch are simple standees. This will not do. So I purchased some bit and pieces here and there and here are the improvements I've made to my "raising the undead" experience:

First, you start with six health and six sanity tokens. Why fool around with 12 easily-lost tokens when one red and one blue die can make an easier-to-use substitute. Just use them to countdown toward death and/or insanity.

For the cadavers/undead, I bought some generic zombie figs. (They glow in the dark too!) If they're laying down, they're cadavers used in experiments. If they're standing upright, they're undead now walking the streets of Arkham.

Tome and ingredient tokens? Feh, how about 3D tomes and small satchels instead! Picked these up from Gamecrafter's Board Game Candy site. (Got the zombies there too.)

For Herbert West and the city watch, I grabbed a couple of DC Heroclix from eBay. Shown here are a Cadmus Scientist and Police Sergeant. I'll swap out their bases for regular mini bases later, but they are a LOT better than the standees.

The Kickstarter for the Reanimator game had a gamemat you could buy that represented the streets of Arkham. I've checked and the mat is no longer available. So I picked up a generic cobblestone gamemat from Frontline Gaming. (Usually used for mini games.)

Put them all together and you have a more immersive Arkham to explore as you play!

Just don't let the city watch track you down and end your research!

Friday, March 29, 2019

DIY DEAD Stamps for MCC/DCC RPGs

One of my favorite facets of the Dungeon Crawl Classics/Mutant Crawl Classics series of RPGs is the ever-popular Zero-level funnel. Each player starts with a handful of non-leveled, unskilled, common folk who are then presented with a situation far beyond their means to cope. When the adventure has ended, those citizens left standing progress to Level 1. This progress leaves a lot of bodies in its wake.

Lots...and LOTS of bodies.

Because of the meatgrinder-like atmosphere of this inaugural sojourn, many DCC/MCC judges are equipped with a self-inking DEAD stamp. It's almost ceremonial to commemorate the death of these disposable peons with a satisfying KA-CHUNK. I've wondered where these stamps were available and, with a bit of research, managed to get my hands on two -- one for DCC and one for MCC. Folks have asked me where I got 'em, so I'm passing that info along to you now!
I got mine from Vistaprint. They carry a wide variety of stamps -- especially self-inking ones. The one I ordered was the rectangular 1.5 x 3 inch version, which seems to be the "standard" amongst judges. My favorite color to use is red (BLOOOOOOD), although there are several others available if you like. Next up, the site asks you to upload the image you want. I was able to locate the stamp designs most preferred by judges (and thanks to the nameless designer who came up with them). I have placed them here on my blog for you to download.
Just grab the image, and upload it to the site. That's it! The stamp runs a bit over $25 (smaller ones cost less), but Vistaprint runs constant sales and promos, so you can get them for quite a bit off if you look. (I didn't pay more than $20 for either of mine.) That's it!

Now, next zero-level funnel you run, watch the players quake in fear as they see you bring out your Dead Stamp. They'll realize just how high the odds are and that you mean business!

Stampy-stampy-stampy-stamp-stamp-stamp...

Monday, October 22, 2018

[GameHack] Pulp Heroes For Pulp Detective By AV Studio Games

I recently reviewed Pulp Detective by AV Games, a clever little dice-rolling game of 1940s private eyes and gumshoes. (Click here for said review!) Although you have your choice of four pulp detectives and four police inspectors (and another four PIs if you pick up the expansion), I wanted the chance to play one of those early pulp action heroes. So I created a mini-deck of four cards that feature four of the classic "superheroes" of the pulp novel era: Doc Savage, The Green Hornet, The Spider, and The Shadow! These larger-than-life master detectives have Special Actions that may seem a bit over-powered, but I woiuld expect nothing less from these classic heroes! Click this link or the image below to download a copy for your own games of Pulp Detective!

Sunday, October 2, 2016

[GameHack] Improved Character Playing Pieces For Wayward Board Game

Here at The Savage AfterWorld, I'm always coming up with little DIY projects for my favorite boardgames. I refer to these projects as "GameHacks". This weekend's GameHack is for one of my favorite boardgames of recent years, "Wayward: The Choose Your Own Adventure Boardgame," which I reviewed earlier this year.


One element I really admire is the look of the game. The gameboard is a thing of beauty with myriad colors and details shining throughout the artwork. Just take a look at a few rooms of the dungeon:


But although the gameboard is amazing to look at, the playing pieces -- although nicely sculpted -- are a bit too bland for my tastes. Each of the players are the exact same sculpt, with the only difference being the color. Also, each player's gold-tracking piece is identical to their gameboard piece which feels a bit flat to me.

See what I mean? 
I wanted player pieces that were just as exciting as the game itself. Figures that looked like they came from a fantasy adventure game. Then it dawned on me -- that's precisely what D&D 4e was all about: nifty-looking figures moving around on a gameboard of sorts. So I went to Noble Knight, and bought a small assortment of single loose D&D 4e miniatures -- the ones made of plastic and pre-painted. Once they arrived, I painted the ring around the base with a unique color. Then, stopping by the dollar store, I bought a cheap chess set and painted the pawns with a matching color to act as the respective player's gold-tracking icon. Here's the results:


Now my game's playing pieces are as dynamic as the game itself. I think I paid less than $2 for each figure and the pawns were literally one dollar. I already had the paints at home so, all said, this project cost me less than $20. The D&D figures work well with the game, and I can see them being repurposed for other games of a similar theme. So look for me with my Wayward game set at a convention near you!

Thursday, April 14, 2016

[GameHack] Saloon Of Horrors: A New Drinking Quest Adventure Available For Download

As I've mentioned in a previous post, I love, love, love Drinking Quest. It combines two of my favorite hobbies: drinking and questing. Plus, it's a damn fun drinking game by way of role-playing. I have the Trilogy Edition that Kickstarted a few years ago, and I'm eagerly awaiting fulfillment of the recently funded Drinking Quest: Journey Into Draught. But I wanted to do more than play Drinking Quest...I wanted to create my own adventure for this humorous RPG. And that's just what I did.

One of my favorite classic adventure modules is a certain notorious deathtrap that takes place "under a lost an lonely hill." After a bit writing, designing, and some fairly-passable cartooning -- as well as getting permission and approval from Jason Wiseman, DQ's creator -- my parody dungeon for Drinking Quest is now complete. Folks, I give you...
"Under a lost and lonely hill, the foul demi-lich Bracererak has built a personal barroom to drink for all eternity. You’ve got a powerful thirst, so you’re not going to let rumors of the “World’s Deadliest Tavern” stop you from sneaking in for a drink!"


This 12-card Drinking Quest adventure is a high-level quest designed to be played after a Quest 4 set. (You'll need to have gained some XP, extra weapons, and more than a few Bellow Ales to get through this adventure!) Can you withstand the terror found within the Men's Room of Dire Foulness? Will you be able to survive the Obvious Deathtrap and Hell's Slip-n-Slide? Prepare yourself for the final confrontation with Bracererak, the demi-lich! (His over-tightened braces have made him cranky.)

The card set is designed to be printed using business card-sized templates for ease of use, or you can print the card sets onto cardstock and trim on the provided lines. Print the cards on one side, flip over the sheet, and print the card backs on the reverse. Download the free PDF, print and cut them out, get out your Drinking Quest set and a few beers, and play this new adventure with your friends! Jason himself said of Saloon of Horrors, "This is hilarious!" which I consider high praise indeed!

Saloon of Horrors for Drinking Quest can be downloaded at this link or by clicking the logo above. Enjoy, and remember: "Quest in moderation!"

Tuesday, September 22, 2015

[Kickstarter] The Check Deck: A Twist On Checkers

 I love gamehacks and optional home rules folks think up for their favorite boardgames. (For example, tossing all taxes and penalties into the center of the Monopoly board, then hoping you're the first to land on Free Parking for that jackpot!) A new gamehack I stumbled across on Kickstarter is "The Check Deck" -- a deck of 34 rule-breaking cards for Checkers. Similar to Knightmare Chess, The Check Deck adds an element of randomness to the otherwise straightforward game of Checkers.

At the beginning of the match, each player is dealt 7 cards at random from The Check Deck. Play then proceeds normally, with the exception that -- instead of moving -- a player can instead play one of the cards in his hand and follow those instructions for his turn. He may be allowed to treat any piece as if it were a King for that turn, jumping and capturing as many opponent pieces as possible. He might play a card allowing him to move two pieces that turn instead. Or he may swap the position of one of his pieces with that of one of his opponents. Freezing a piece in place, or removing any piece from play could also happen.
The Check Deck already hit its minuscule goal of $100 with 27 days left to go. Only $12 gets you a deck shipped free anywhere in the U.S. with delivery in November in time for Christmas. (Apparently all that's needed is funds for printing, as a prototype deck is featured on the Kickstarter page.) I can't remember the last time I broke out my Checkers board, but this sounds like a nifty addition to try out and toss into the gamebox for future diversions. For $12? Sure, king me!

Sunday, April 12, 2015

[GameHack] Build A Better Zombie Horde For Escape: Zombie City

As part of International TableTop Day, I wrote an overview of Escape: Zombie City. Now, I really like this game a lot, but to be frank, the zombies that came with it are a bit lacking.

First up: many other zombie boardgames comes with actual zombie figures for use with play. Cardboard cut-outs placed into plastic standees strikes me as a bit cheap-looking. (Also, the player and van figs are physical wooden props, so why not the zombies you fight/flee from? My other issue was that the coloring used to differentiate the power of the zombies (red, yellow, and green) was applied very lightly. As a guy with severe color-blindness, this made the zombies nearly impossible to identify during the heat of play. I needed zombies that were RED, YELLOW, and GREEN. So I decided to Build a Better Zombie Horde.

If you're color-blind, these are identical -- except for the numbers, of course.

I know there are many places online where you can buy ready-to-go zombie figures for use with other zombie games. (The Bag O' Zombies for use with Zombicide comes to mind.) But for this project, I didn't want cookie-cutter zombies who all looked the same; No, I wanted an assortment of different zombies in different poses who stood just a touch bigger -- the size of little green Army men, in fact.

I did a bit of searching online, I found a 60-piece zombie playset filled with an assortment of undead -- just what I was looking. I then gathered up some white poker chips, epoxy, plastic primer, three tubes of acrylic paints, and some double-sided foam tape.

My staging area for my soon-to-be-released zombie horde.

First I sorted out 20 zombies in interesting poses I liked, then I glued them to the poker chips for a stable base. After dusting them with the primer, they held the acrylic paints well.

A few zombies both pre-painted and post-painted.

For the fist/bat icons, I scanned a few of the original figures, then trimmed the icons down in size (removing the "X" as superfluous). I printed them onto thin cardstock, covered them with a layer of clear tape (to protect the imagery), then stuck them to the bases with foam-backed double-sided tape. This both "lifts" the icon up for easier reading, as well as adheres to the irregular shape of the poker chip base.
Compared to the originals, I like my zombies a LOT better for gameplay!

 And my Escape: Zombie City "new-and-improved" zombie horde is ready to storm the table!

During gameplay, you'll need to draw these blindly out of a box rather than the cloth bag provided with the game, but I think these are going to see a lot of use in future games!